1. Getting started
ReelScribe opens in a single window. There is no account and no sign-in — you can start using it immediately. Cloud transcription and AI features are unlocked by an App Store subscription, and cross-device sync uses your own Apple iCloud.
- Launch ReelScribe. The main window opens directly with your library.
- Import a video and start playing, taking notes, and adding subtitles right away — no setup required.
- To use cloud transcription or AI features, open Settings → Subscription and choose a plan. Purchases are handled by the App Store.
- To keep your library in sync across devices, enable iCloud sync (see Section 10). This uses the iCloud account you are signed in to in macOS.
Local features such as video playback and note-taking work without any subscription. Cloud transcription and AI features require an active App Store subscription.
2. Importing videos
The left sidebar is your library. When it is empty, it shows an Import a Video to Get Started prompt. There are several ways to add videos:
- Click Import Video in the empty state, or choose File → Import → Import Video (⌥⌘I).
- Drag a video file from Finder directly onto a folder in the sidebar — or onto empty space to drop it into Uncategorized Videos.
- Double-click a
.bayanresource package in Finder, or use File → Import → Resource Package, to import a video together with its subtitles and notes.
Organize your library with folders: use New Folder (⌘N), New Subfolder (⇧⌘N), Rename (⌘R), and Delete (⌘⌫). Right-click any folder or video for the same actions. Deleted items move to Recently Deleted, where you can restore them or remove them permanently.
Common formats such as MP4, MOV, M4V, and MKV work out of the box. If a duplicate (same size and length) is detected, ReelScribe skips it and shows a notice.
3. Generating subtitles
ReelScribe turns speech into accurate, time-aligned subtitles. Before you start, open a video, and — if you want on-device transcription — download a Whisper model first (see below).
- Right-click a video in the sidebar and choose AI Generate Subtitle, or use the top Subtitle menu.
- Watch the progress panel above the subtitle list: it moves through preparing, extracting audio, transcribing, optimizing, and saving, ending with Subtitle generation complete! You can cancel at any time.
- The finished track is selected automatically and appears in the subtitle list.
Choosing a transcription engine
The engine is a preference, set once in Settings → Transcription:
- Cloud (Google Chirp 3) — highest accuracy across 75+ languages, including noisy audio, accents, and dialects. Audio is uploaded for processing and counts toward your transcription minutes. Includes Auto Detect language, profanity filtering, and background-noise reduction.
- Local (Whisper) — runs entirely on your Mac; audio never leaves the device, and it is free. Pick
large-v3-turbo(recommended) orlarge-v3, then click Download and wait for the status to read Downloaded before transcribing. Best on clean, standard speech.
You can also tune Subtitle Cue Length (Short / Medium / Long) and Sentence Splitting (Standard / More Aggressive).
Already have subtitles?
Use Subtitle → Import Local Subtitle (⇧⌘O) to load an .srt or .vtt file, or Use Embedded Subtitle to pull a track that is already inside the video file.
4. Learning with subtitles
The subtitle list keeps pace with playback and highlights the current line. Click a line to jump to that moment — if word-level timing is available (cloud transcripts include it), clicking an individual word seeks to that word.
- Highlight: select subtitle text, right-click, and pick a color (Yellow, Green, Blue, Pink, or Orange). Choose Remove Highlight to clear it.
- Annotate: right-click selected text and choose Add Annotation to attach a note. Annotated text shows a dotted underline; hover to read the note.
- AI Explain: right-click a word or phrase and choose AI Explain for an instant glossary-style definition in context, which you can copy or save as an annotation.
- Search: use the search bar (scope All / Highlighted / Annotated) to find any line or note, then click a result to jump to it.
Dual subtitles
ReelScribe can show a Primary and a Secondary subtitle track at the same time — perfect for comparing a transcript with its translation. Pick each track from the Subtitle menu, where tracks are grouped into Imported, AI Generated, and Embedded.
Fine-tune timing with Subtitle Delay: earlier with ⇧⌘G, later with ⇧⌘F, and reset with ⌥⌘R.
5. View modes
Switch the workspace layout from the View menu or the toolbar buttons:
- Video Mode (⌃⌘1) — player, timeline, a bottom panel for Chapters or Longcut highlights, and a right sidebar with Subtitle, Notes, and Assistant tabs.
- Reading Mode (⌃⌘2) — a full-window, distraction-free subtitle reader with its own font, highlight, annotate, and search controls.
- Note Mode (⌃⌘3) — a full-window note editor for focused writing.
ReelScribe remembers your last view mode and restores it when you reopen a video.
6. AI chat
Open the Assistant tab in the right sidebar to ask questions about the current video. The assistant answers using the video's subtitles (and, optionally, the video itself) as context.
- With a transcribed video open, click a starter prompt — Extract Themes, Outline Narrative, Extract Key Terms, Summarize Key Points, or Analyze Argumentation — or type your own question.
- Press Return to send (⇧Return for a new line). The reply streams in; press the stop button to cancel.
- Use the + button to add your current note as extra context, or open the history menu to revisit earlier conversations for this video.
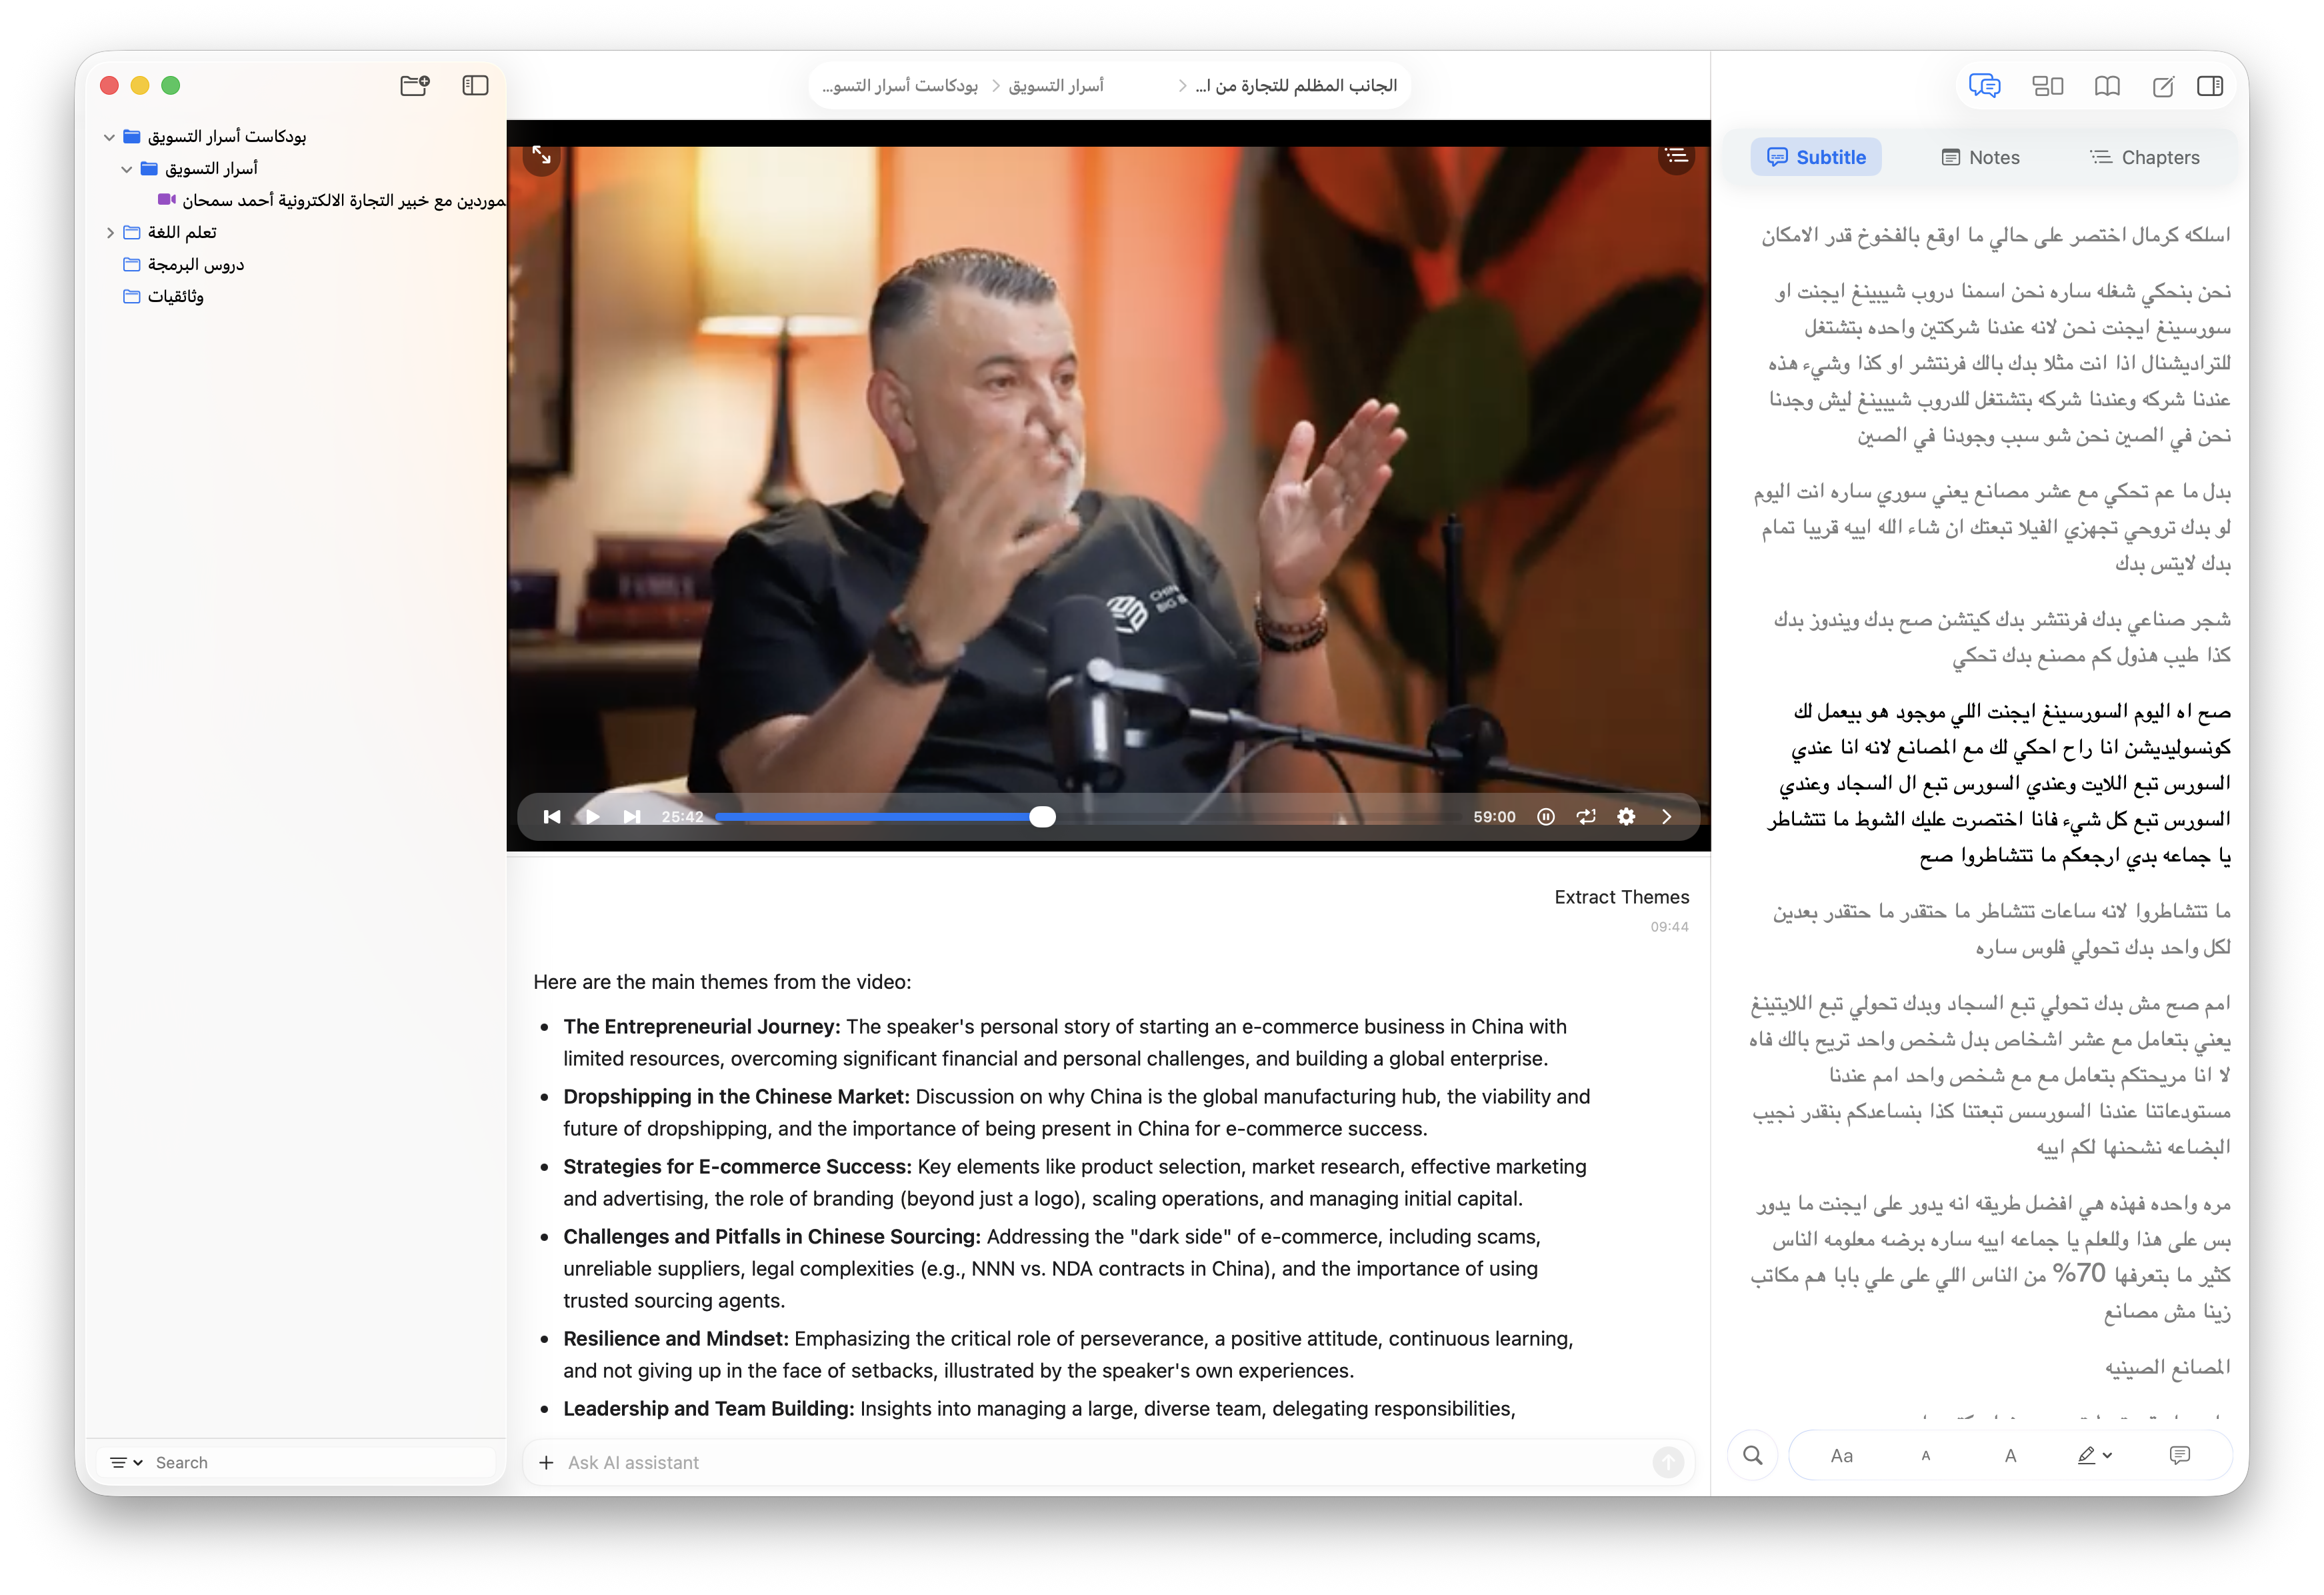
In Settings → AI you can set the AI Context Source (subtitles, or prefer the video when eligible) and toggle whether conversation history is included. Set the reply language in Settings → Language.
7. Longcut highlights
Longcut distills a long video into its key topics so you can grasp the essence in minutes. It needs a completed transcript.
- In Video Mode, switch the bottom panel to Longcut. ReelScribe analyzes the transcript, showing progress as it scans blocks and groups themes.
- Browse the result: a color-coded timeline of topic segments and a scrollable list of topic cards with subtopics. Click any segment or card to jump to it.
- Switch between auto-detected themes, or choose Custom and enter your own keyword to re-analyze around a topic you care about.
- Press Play All to play through a topic's segments back to back.
8. Chapters
Chapters are manual or AI-generated markers along the timeline. In Video Mode, switch the bottom panel to Chapters.
- Click + (or the player's Add Chapter control) to create a chapter at the current time, then give it a name.
- Sort chapters by time, creation, or name, and search to find one quickly.
- Use the Playback menu to add, edit, or clear chapters. AI-generated and manual chapters live side by side.
9. Taking notes
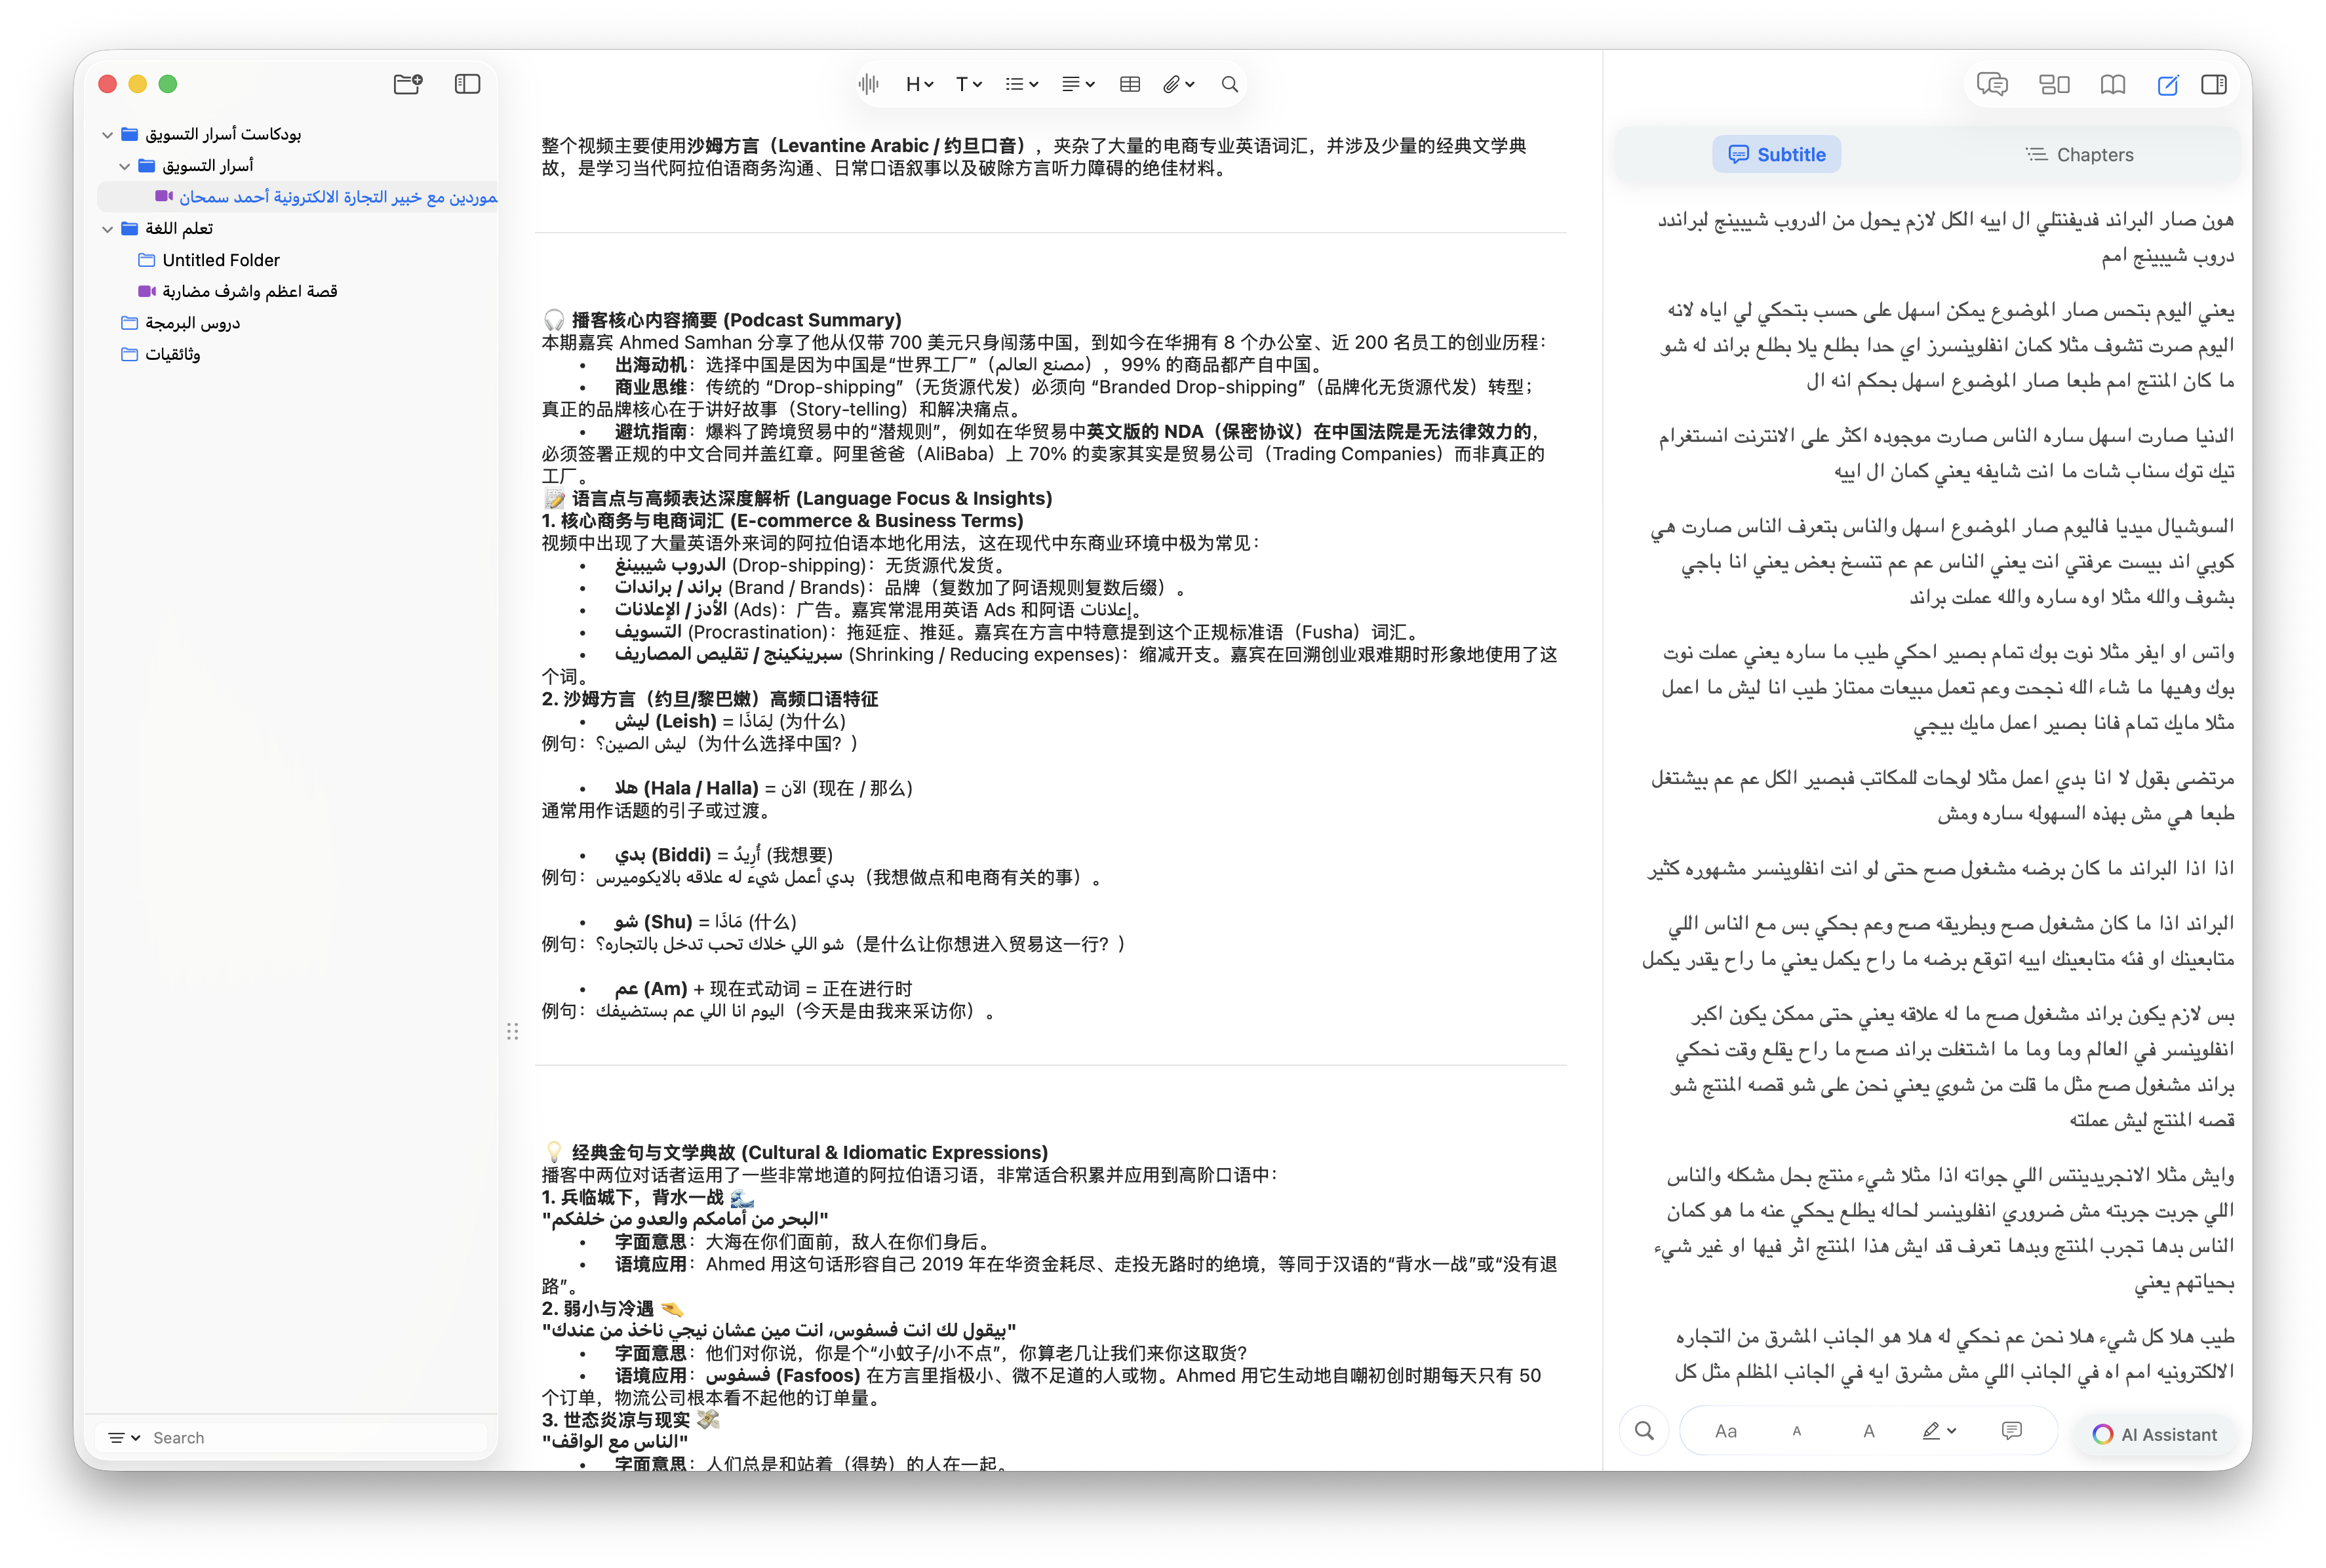
Each video has its own block-based note, available in Note Mode and in the Notes tab. Notes save automatically.
- Type / in an empty line to open the command menu: Title, Heading, Subheading, Body, List, To-Do, Block Quote, Table, Divider, and Insert Timestamp.
- Insert Timestamp drops a clickable link to the current playback time — click it later to jump straight back to that moment.
- Format text with the toolbar or shortcuts: Bold (⌘B), Italic (⌘I), Underline (⌘U), and Highlight (⇧⌘H).
- Attach photos, files, sketches, or scanned documents, and insert tables you can copy as Markdown, HTML, or CSV.
10. iCloud sync
iCloud sync keeps your library — videos, subtitles, notes, highlights, and chapters — backed up and consistent across devices. It is opt-in and uses your own Apple iCloud (CloudKit private database and iCloud Drive); your synced library is stored in your iCloud account, not on our servers. Make sure you are signed in to iCloud in macOS.
- Open Settings → iCloud Sync and turn on Enable iCloud Sync.
- Optionally enable Auto Upload and restrict transfers to Wi-Fi only.
- Right-click any video to Sync to iCloud, download it, or remove the local copy. The status bar shows whether you are synced, syncing, paused, or offline.
Clear iCloud Data permanently removes ReelScribe’s synced content from your iCloud — use it with care.
11. Settings & plans
Open Settings to manage every part of ReelScribe:
- Subscription — view your plan, subscribe, and check usage.
- iCloud Sync — enable sync, manage uploads and storage.
- Language — app display language (a restart applies it), AI chat language, and transcription language.
- AI — context source and conversation-history options.
- Transcription — engine, Whisper model, language, cue length, and splitting.
- Storage Location — choose where your library lives on disk, or open it in Finder.
ReelScribe offers a free trial plus Starter, Plus, and Pro plans. Cloud transcription consumes transcription minutes; AI features (chat, AI Explain, chapters, and highlights) use AI credits.
12. Keyboard shortcuts
A few shortcuts that speed up everyday use:
| Action | Shortcut |
|---|---|
| Play / Pause | Space |
| Previous / Next subtitle | A / D |
| Replay current subtitle | S |
| Auto-pause at line end | Q |
| Import video | ⌥⌘I |
| Video / Reading / Note mode | ⌃⌘1 / ⌃⌘2 / ⌃⌘3 |
| Show / hide subtitles | ⇧⌘S |
| Insert timestamp (notes) | ⇧⌘T |
Need more help?
Still stuck? Email us at support@bayanlistening.top and we will be glad to help.